Wednesday, July 28, 2010

"Forever Yours" - PTU Tut


*What you will need*


PaintShopPro (any version should work)
Font I used : Precious
Mask of choice
Eye Candy 3.1

**This tutorial assumes that you have working knowledge of Paint Shop Pro.**

**This tutorial was written by Aimee Pryor on July 28, 2010. Any similarity between
this tutorial and another is nothing but coincidence. You may link back to my tutorials, but do
not copy them and put them on your own group or site of any kind. If you'd like to share your creation, you may email them to me at acpryor@live.com and I will share them here :o) Thanks!**

Let's start by opening a new 600 x 600 pixel image.
Also open the tube you're using, along with the mask.  Minimize
both for later use.

Open DBS_TulleFrame01 - Resize 75%
Copy and paste as a new layer.  Using Eye Candy 3.1 - Glow with the
settings below:
 I used the color #E7C58F

 Open DBS_Flowers02 - Resize 50% - Copy and paste as new layer.
Arrange to the bottom of the frame and to the right just a little bit.
Look at my tag for placement if needed.  Apply a drop shadow of 2, -2,
60, 8 Black.  Remember this setting, we'll be using it throughout the
tutorial.  Now let's take one of the other flowers, I chose DBS_Flower07.
Resize 10% - Copy and paste as new layer. 
Duplicate 2 times, you should
have 3 copies of the flowers.  Arrange to your liking.  Apply the drop
shadow we used before to each of the flowers.

Make your frame layer active, using your magic wand.. click inside
the frame.  Selections - Modify - Expand by 2.  Choose a paper from the
kit - Copy and paste as new layer.  Selections - Invert - Delete.
Move the paper layer below the frame layer.  Still selected - Copy
one of the sparkle images - Resize 50% and paste as a new layer.

Keeping selected - Open one of the gazeebos from the kit, resize 80%,
then again at 90% - Copy and paste as new layer - Arrange to your
liking - Delete.  Select none.  Duplicate the gazeebo layer - Adjust - Blur -
Gaussian 3 - Change the blend mode to overlay - Merge together the two gazeebo layers.  Change the opacity to 70%. 

Make your frame layer active - Open one of the tubes 
Thanks for giving it a try :o)

from the kit, resize 85% - Copy and past as new layer.
The tube should be just above the frame layer and just below
the flower layer.  Apply the same drop shadow we used before
to the tube layer.

Now I'll list the elements I used and how I resized them.
DBS_Heart01 - Resized 20% (I placed mine just below one of
the red flowers)
DBS_Champagne_n_Roses01 - Resized 30% (I placed mine on the
left side)
DBS_WeddingRings - Resized 20% (Placed just above the
 champagne n roses)
Apply the same drop shadow as before
to all the element layers.

X out the bottom raster layer - Merge visible.
Resize the merged layer to 500 x 500 pixels.
(Make sure Resize all layers is unchecked)
Un X the bottom layer - Select all - Choose a paper
from the kit - Copy and paste INTO selection.  Select none.
Layer - New mask layer - Choose your mask.
Merge group - Make the
top layer active - Copy one of the word art images from the kit,
resize 40% - Copy and paste as a new layer. Select all - Float - Defloat -
 New layer - Fill with a lighter color,
I used the same pale yellow color that I used in the glow
around the frame - Select none.  Move that fill layer just
below the word art.  Apply drop shadow we used before.

Resize to your liking.
Add your name and copyright info.
Save as .png for a transparent background
and .jpg for a white background.
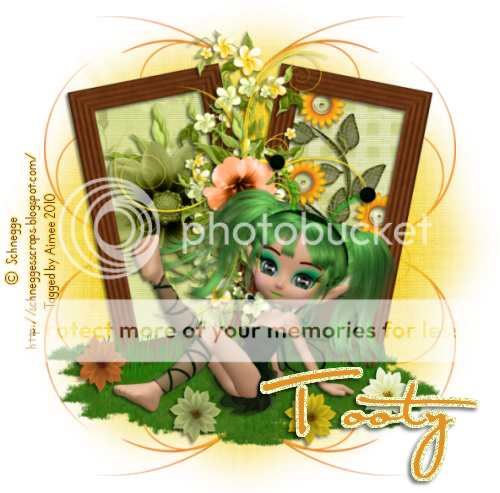
Hope you didn't get too lost in that tut!


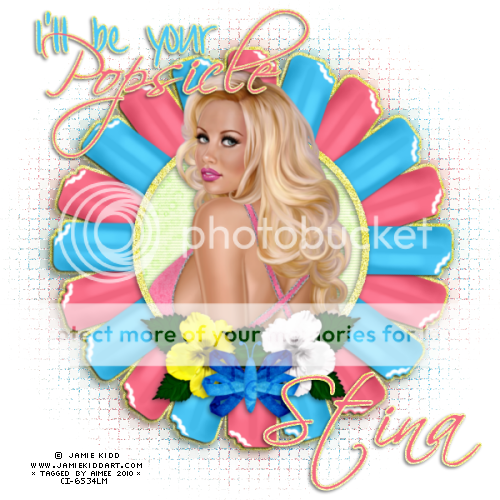
*Here's another tag I made using the same kit... I barely scratched
the surface of this kit... the possibilities!!*

Star Blings!

Made ya'll another bundle o' blings!! :o)
This time, they're stars!

Preview:
Download here.
As always, leave some love if you download.

Thanks!!

"Carry Me In Your Heart" PTU Tut


*What you will need*
PaintShopPro (any version should work)
Font I used : Bickham Script Fancy
Tube © Igolochka
Mask by Me

**This tutorial assumes that you have working knowledge of Paint Shop Pro.**
 
**This tutorial was written by Aimee Pryor on July 27,2010. Any similarity between
this tutorial and another is nothing but coincidence. You may link back to my tutorials, but do
not copy them and put them on your own group or site of any kind. If you'd like to share your creation, you may email them to me at acpryor@live.com and I will share them here :o) Thanks!**

Open a new 600 x 600 pixel image.
Have the folder that holds the kit open for easy access to the elements
and etc.  Open my mask in PSP and minimize for later use.
Also open the tube you're going to be using and minimize.

From the kit, let's grab a frame... I chose to use tp_heart string3 as
my frame.  Resize by 70% - Copy and paste as new layer onto your new
image.  Move it down slightly, to allow us room at the top
of the image for our deco.  When you've got it where you want it,
Choose a paper from the kit, Resize 60% - On your image, using the magic wand tool, click inside the frame - then selections - modify - expand by 2 -
Copy and paste your paper as a new layer.  Selections - Invert - Delete.
KEEP SELECTED!!  Now let's add the tube you've chosen, if using the same one
I did, resize her 50% - Copy and paste as new layer.  Arrange her to your
liking then hit delete.  Select none.  Now make the frame layer
active and paste your tube again, making sure to line the top copy
up just right with the bottom copy.  When lined up, using your eraser,
erase the bottom part of the tube that goes beyond the frame.
Add a drop shadow of : 2, -2, 60, 10 - Black to the bottom tube layer.
Also add that same shadow to the frame layer.

Just to ensure that we have plenty of room to work with, let's
resize our canvas to 800 x 700.  Don't worry... we'll be resizing near the end.
Alrighty...with the frame paper layer active... 
Choose a deco item from the kit, I chose tp-deco6 - Resized by 50%
Copy and paste as new layer.  Arrange just to the right of the tag.
Duplicate the layer - Mirror the copy. Merge down.  Duplicate and then
arrange to your liking.  Apply drop shadow. (You should be able to see some
of the flowers from the deco... on the paper layer... hence the reason I
did it this way)

Make the bottom layer active...
Now let's choose another deco item from the kit.  This time I chose
tp-deco3 - Resized 45% - Copy and past as new layer.  Make sure
this layer is below all the other layers.  Arrange to the right of the tag,
slightly.. then duplicate - Mirror - Merge down.  Duplicate again -
Arrange to your liking - Merge down.  Apply same drop shadow.

Lookin' good!  Let's make the frame layer active.
Alright, let's choose yet another deco... I chose tp-springtime deco3
Resize by 45% - Copy and paste as new layer.  Arrange onto the right
side of the tag, towards the bottom, look at my tag for placement
if needed.  Apply same drop shadow as before, changing the blur
to 5.  Now to top that off, grab a flower from the kit, I chose tp-singlerose1
You shouldn't need to resize the flower, Copy and paste as new layer.
Arrange to your liking, I placed mine where the bottom point
of the heart frame would be.  Add drop shadow (the one we've
been using throughout the tut).

One last touch... the mask!
First...let's resize things a bit.  X out the bottom layer of your
image...then merge visible.  Crop all the opaque.
Image - Resize 80% - All layers checked.
Now let's un X our bottom layer - Select all - Choose a paper from
the kit - Paste INTO selection.  Select none.
Layer - New mask layer - From Image -
 Choose my mask ACP-TNT-Mask11  Apply.
Merge group and duplicate.  Merge the two mask layers
together.  Select all - Float - Defloat - Modify by 2
Layer - New raster - Fill that selection with white.  Select none.
Move the white layer just below the mask layer.
Merge visible.  Crop opaque.  Resize to your liking.
Add your name and all copyright info.
Save as .png for a transparent background or .jpg for a white background.
I hope you enjoyed this tut and it wasn't too confusing to you!!

Thanks :o)

Tuesday, July 27, 2010

Masks 9, 10, & 11

3 more masks for you to play with!! :o)

Mask9
(I duplicated the mask, so you could see it better)

Preview:


Mask10

Preview:

Mask11

Preview:

Thanks!!


Tag template #15

Another little goodie for you!! :o)
Template #15

Preview:
Download here

Thanks!!

More wordart!!

Here's a Birthday Wordart Bundle!  Hope someone
can use them.

Preview:

Download here

Also...here's wordart I made specifically for a tag/tut I made
just a bit ago.  "I'll Be Your Popsicle" :o)

Preview:

Download here

Thanks!!

Bundle O' Blings!

All kinds of colors and very easily colorized if I didn't make one
to suit your needs.  I was messing around in PSP and created these blings/decos that I hope someone out there can and will use.

Preview:

Download here

Thanks!!
As always, if downloading, please leave some love...


Patriotic Template!

Been a while since posting anything... and I meant
to post this a while ago... lol.  Better late than never, right? :o)

Anyway...here's the preview


and you can download the template HERE.


Please leave love if downloading!
Thanks!!


Wednesday, July 7, 2010

Floral Surprise - PTU Tut


*What you'll need*

PSP Any version should work
PTU Kit "Floral Surprise" by TootyPup
Font used - Satisfaction
Poser tube © Schnegge
Mask of choice
Lawn and Grass blade tubes that come with PSP.
If you don't have them, you can get them HERE.
PLUGIN: Jeux De Lignes Entrelacement

**This tutorial assumes that you have working knowledge of Paint Shop Pro.**
**This tutorial was written by Aimee Pryor on June 6, 2010. Any similarity between
this tutorial and another is nothing but coincidence. You may link back to my tutorials, but do
not copy them and put them on your own group or site of any kind. If you'd like to share your creation, you may email them to me at tnt-aimee@live.com and I will share them here :o) Thanks!**

Ready?!

Open whatever mask you want to use in your PSP and minimize it for use
later. Also install the font and whatever plugins before opening your PSP.

Alright... Let's start by opening a new 600 x 600 Pixel (Transparent) image.
Open a frame from the kit, I chose the brown one, resize 50% - Copy
and paste as a new layer. Resize again by 80%. Image - Rotate - Free rotate - Right 90. Using your deform tool, give it a slight angle to the left.
Duplicate - Mirror. Now you should have two frames.

Ok...now open one of the vines from the kit, I chose tp-flower vine3
Resize 45% - Copy and paste as a new layer. Move to the center
of the two frames, look at my tag if needed. Apply a drop shadow
of 3, -3, 50, 10 - Black. We'll be using that same shadow throughout
the tut, so keep it handy!! :o) Now open another vine, I chose tp-flower
vine5 - Resize 40% - Copy and paste as new layer - Mirror and arrange
to your liking above the other vine. Again, look at my tag if you need to.
Apply the same drop shadow as before.

In case you're wondering, we're making a cluster ;o)
Ok. Now... let's open one of the doodles. I chose tp-doodle3 -
Resize 40% - Copy and paste as new layer. Duplicate - Mirror -
Flip. Merge down. Place to your liking above the vine layers. Apply same
drop shadow as before. Lookin' good... lookin' good!
To finish off our cluster, we need to add a pretty flower... I chose tp-flower11
Resized 40% - Copy and paste right in the middle of the cluster.
Of course, you'll just have to eyeball it, no one's perfect!!
Apply the same drop shadow. Close out both the frames
and merge visible. Phew! Nice cluster ya' got there!!

Ok. On with the tag! Make one of the frame layers active - Using your magic wand, click inside one of the frames - Selections - modify by 3.
Choose a paper from the kit, I chose tp-paper11 (and tp-paper6)
Resize the paper at 60% - Copy and paste as new layer - Move it below
the frame layer - Selections - Invert - Delete. Select none.
Apply Entrelacement with the settings below:


Apply. Do the same for the other frame layer.
Apply the drop shadow we used above to both frame layers.

For each of the frame backgrounds, this is merely a choice...
I added a floral element to each. If you'd like to do the same,
just make the paper layer active - Select all - Float - Defloat
Choose an element - Paste as new layer - Invert - Delete - Select none
and apply drop shadow. The elements I used for each were tp-flower14
and then tp-flowerpot6 - Both resized 50%.

Now let's add one of those cute little tubes!! Make the cluster layer active...
I chose to use tp-poser2, Resize her at 50% - Copy and paste towards the bottom center of the tag. Apply same drop shadow. Alrighty... add a new layer,
and name it lawn. Move that layer below the frame and paper layers.

Using the lawn tube that comes with PSP, set to it's default, make some lawn
underneath the tube. You'll have to click a few times, to get what you like.
You can look at my image for ideas, if you need to. Add a new layer - name
it grass - Move this layer above the frame layers - Using the grass blade tube
that comes with PSP - With the default settings, except change the scale to 25.
Draw out some grass blades along the bottoms of the frames. Don't worry
if it looks "choppy"...we're going to fix that. Once you get the grass looking
the way you want to... Grab your smudge tool.
With the settings below:


Smudge the bottom parts of the grass blades to blend them in with the lawn.
It works really well and hides those 'choppy' edges. Once satisfied, resize the image 500 x 500 pixels (all layers checked). Then change the canvas size back to 600 x 600. That gives us room to work with our mask.

For the mask.... Make the bottom layer active (you should have a raster
layer at the bottom with nothing on it, if not.... add a new layer and move it down). Select all - Choose a paper from the kit, I chose tp-paper3, Copy
and Paste INTO selection. Select none. Layers - New Mask Layer - select the mask you're using - Apply. Merge group. Duplicate - Flip - Merge down.

Now you can resize the image again... this time to your liking.
Add your name and copyright info.
Save as .png for a transparent background and .jpg for a white background.
That's it! I hope you enjoyed this tut and that I didn't lose you in the process... lol.

Thanks!


Bibbidi Bobbidi Boo - PTU Tut


*What you will need*

PaintShopPro (any version should work)
PTU Kit "Strinarella" by Stina
Font of choice
Tubes © MediEvil Creations and are included in the kit.
(BE SURE to follow her TOU!)
Mask of choice
My wordart (or another of your choice)
No filters needed!! :o)

**This tutorial assumes that you have working knowledge of Paint Shop Pro.**

**This tutorial was written by Aimee Pryor on June 13, 2010. Any similarity between
this tutorial and another is nothing but coincidence. You may link back to my tutorials, but do
not copy them and put them on your own group or site of any kind. If you'd like to share your creation, you may email them to me at tnt-aimee@live.com and I will share them here :o) Thanks!**

Alrighty people you should already have the mask you've chosen to use open in your PSP... as well as installed the font of your choice.

With that being said....let's start this!!

Open a new 600 x 600 pixel image. Select all - Add a new layer - Choose
a paper from the kit, Copy and Paste INTO selection. Select none.
Layer - New Mask Layer - Choose your mask, Apply. Merge group. My mask was large, so I resized it 85%... you may need to do the same, depending on your mask. Play with the sizing a bit. I also duplicated and flipped my mask to make it even outside my image.

Now let's grab DBS_Frame10 - Resize by 70%
Copy and paste as new layer - Then Image - Rotate - Free rotate 90 degrees
to either direction. With your frame layer active - Take your magic wand and click inside the frame - Selections - Modify by 5. Choose another paper from the kit, resize 60% - Copy and paste as new layer. Move the paper layer below the frame layer (KEEP SELECTED!) We're going to add our tube now, while we've still got this area selected. Choose one of the tubes from the kit, I chose DBS_medi_ellablue2 - Resize her at 60% - Copy and paste as new layer. Selections - Invert - Delete. Select none. Apply a drop shadow
of 2, -2, 70, 10 to both the frame and tube layers.

Make your frame layer active - Paste your tube again - Align this tube layer with the bottom tube layer and erase all the parts of her that go beyond the frame at the bottom of the tag. Close out the bottom layer and merge visible to this point. I have a feeling you're doing great out there! :o)

Now let's add some awesome elements!!

Choose one of the lace bows from the kit... I chose DBS_Lacebow05 - Resize 60% Copy and paste as new layer. Arrange to the top left of the tag, kind of on the corner of the frame. Grab DBS_RoseCluster02 - Resize 45% - Copy and paste as new layer and arrange above the lace bow, on the corner of the frame. Apply drop shadow above to both of those element layers.

You can merge again now, if you'd like.

K... now let's grab DBS_MagicWand - Resize 60% - Copy and paste as new layer Mirror the image and arrange to the bottom right of the tag. Apply drop shadow. Now grab DBS_HorseCarriage01 - Resize 60% - Copy and paste as a new layer - Arrange to the bottom of your tag... Look at my tag if you need to. Apply the drop shadow. Just for added "oomph", I placed DBS_Sparkles02

On the background part of my tag and erased the outside bits.
Now resize your image 500 X 500 pixels (all layers checked).
Make your canvas size 600 x 600. This is just to ensure that our wordart
and name will have plenty room to be added!! :o)

Open my wordart - Resize 70% - Copy and paste as new layer and move to the top of the tag. Apply drop shadow. (If you chose to use another wordart, that's ok too) Now add your name - Give it the same drop shadow as
we've been using throughout the tut. Merge visible - Crop out the extra.

Resize to your liking.... Add ALL copyright info and save as .png for a transparent background and .jpg for a white background.

I hope you enjoyed this tut and it wasn't too confusing to you!!

Thanks :o)


Here are a couple extra tags I made using the same kit :o)


Monday, July 5, 2010

I'll Be Your Popsicle - PTU Tut


**What you'll need**

Jasc Paint Shop Pro (Any version should work)
Mura Meister's Cloud and Copies
and Penta.com's VTR2 all can be found HERE
My word art, you can get here
Font used : Scriptina
Tube (C) Jamie Kidd
You MUST acquire a license from CILM in order to use
the tube.

**This tutorial assumes that you have working knowledge of Paint Shop Pro.**

**This tutorial was written by Aimee Pryor on July 5, 2010. Any similarity between
this tutorial and another is nothing but coincidence. You may link back to my tutorials, but do
not copy them and put them on your own group or site of any kind. If you'd like to share your creation, you may email them to me at acpryor@live.com and I will share them here :o) Thanks!**

Ready?! Let's do this!!

Let me start by saying this may look difficult, but it's really not...
Okie dokie.  Open a new 600 x 600 pixel image.
Choose one of the popsicles from the kit.
Whatever color you'd like to use, could be the same or not... your choice!
Resize the popsicle by 30%.  Copy and paste as new layer.
Effects - Plugins - Mura Meister Copies.
With the settings below:


Apply.  Now choose another popsicle from the kit,
resize the same as before.  Copy and paste as a new layer.
Mura meister copies with the same settings as before.
Apply.  Now using your deform tool, slightly turn the top
layer of popsicles to the right or left, filling in the empty
space of the bottom popsicle layer.  Look at my tag, if you need
to.  When satisfied, apply.  Add a drop shadow of 2, -2, 50, 4 - Black
to each of the popsicle frame layers.

Easy peasy so far!!
Okie dokie.  Let's grab our selection tool, set to circle,
and draw out a circle selection that reaches just a little beyond the
popsicle sticks.  If I've just confused you.... look at my sample image
below.


Choose a paper from the kit, resized 70% - Copy and paste
as new layer onto your image.  Selections - Invert - Delete - Invert
Modify - Contract by 10 - Delete.  Select none.  Adjust - Noise -
Gaussian 50%.  Using your magic wand, click inside the frame area -
Selections - Modify - Expand by 2.  Choose another paper from
the kit - Resized 70% - Copy and paste as new layer.  Selections -
Invert - Delete.  Keep selected!! Move this layer below the frame layer.
Apply VTR2 to the paper layer with the settings below:


Now let's grab our main tube!  If using the same one that
I have used, resize her by 60% - Copy and paste as new layer.
Arrange to your liking... then delete.  Select none.
Make your frame layer active - Re paste the same tube and line
up with the bottom tube layer.  Using your eraser,
erase all the parts of her that show beyond the bottom of the frame layer.
Apply the same drop shadow we used before on the bottom tube
layer.  Also add that same shadow to the frame layer.
X out the bottom layer and merge visible.

Here's a list of the few elements I used:
DBS_Hibiscus02 - Resized 30%
DBS_Hibiscus04 - Resized 30%
(arrange both of those to your liking)
DBS_FoldedButterfly01 - Resized 25%
(place in center of the two flowers)
Add the drop shadow we used before to each of
those layers. Merge visible.

Alrighty.  Choose another paper from the kit,
no need to resize, unless you'd like to.
Back to your image....select all - Float - Defloat
Selections - Modify by 2 - Copy and paste the paper
as a new layer.  Apply the same noise as before.
Select none.  Add same drop shadow as before.

Merge the image visible.  Duplicate.  Change your canvas
size to 650 x 650 pixels to allow us some room.
On the bottom image layer - Adjust - Blur - Gaussian
set to 10.  Effects - Texture effects - Mosaic Antique
with the settings below:

Apply.  Resize the image to your liking,
add wordart, your name and all copyright information.
Save as .png for transparent background or .jpg for a white background.

I hope you enjoyed this tut and it wasn't too confusing to you!!

Thanks :o)


Fun In The Sun - PTU Tut


~*~ What you'll need ~*~

Jasc Paint Shop Pro (any version should work)
Font of choice
Corel's Sand tube, which you can find here
(In the beach bundle pack)
WSL Mask 26 by Weescotslass
Cookie poser © Belle's Graphics (included in kit) 
 
**This tutorial assumes that you have working knowledge of
Paint Shop Pro.**

**This tutorial was written by Aimee Pryor on July 3, 2010. Any similarity between
this tutorial and another is nothing but coincidence. You may link back to my tutorials, but do
not copy them and put them on your own group or site of any kind. If you'd like to share your creation, you may email them to me at acpryor@live.com and I will share them here :o) Thanks!**

Ready?!
Okie dokie... open a new 600 x 600 pixel image in your PSP.
Also have your mask open and minimized for now.
Choose one of the circular frames from the kit,
I chose DBS_Frame03 - Resized 80% - Copy and Paste as new
layer.  Now using your magic wand tool, click the inside space of the
frame - Selections - Modify - Expand by 2.  Choose a paper from the kit,
Resize 80% - Copy and paste as new layer - Selections - Invert - Delete.
Keep selected!! Now choose the wave from the kit, No need to resize,
just arrange to your liking and hit delete.  Select none.
Add a drop shadow of 2, -2, 50, 10 to the frame.  We'll be using this shadow again, so remember those settings. Merge visible (X out the bottom raster layer) and resize the image by 83%.

Open the sand castle from the kit, resize 50% - Copy and paste as new layer.
Arrange to your liking, I put mine on the right side of the tag.
Apply drop shadow.  Now choose a tube from the kit, I chose the one
with the beach ball.  Resize to your liking, if using the one I did,
resize 85%.  Apply same drop shadow as before.
Add a new layer!!
Now as I stated before, we'd need the sand tube that comes in the
beach bundle of tubes from Corel.  Using your tube tool, with the sand
selected - Scale 100 and Step set to 3 - Go along the bottom of the image,
a little below the frame, draw out some sand.  Look at my tag if you need
an idea on where to put it.  It may take you quite a few control z's (undo)
before you get your sand just right, lol... but you'll get it!!

Once done with the sand, we're going to add a few more elements.
I will tell you what I used and any other details.
DBS_Sun01 Resized 50% then 80%
DBS_PalmTree02- Resized 50% - Duplicate - Mirror.
Apply same drop shadow as before to those element layers.

Now let's choose a paper for your mask. Copy it.
On your image, Make the bottom (empty) layer
active - Select all - Paste INTO selection.
Select none.  Layers - New Mask Layer - From Image
and choose WSL Mask
Apply.  Merge group.  Duplicate 3 times - X out the other
layers and merge visible the mask layers.
Now choose another paper from the kit - Resize 75% - Copy
and paste as new layer - move it just below the mask that
we just did.  Now merge visible.

Image - Add Borders x symmetric 2
I chose a dark blue color, purely your choice.
Repeat, but choose another color, I chose yellow.
Change your canvas size to 650 x 650 pixels.
With a thickish font, write out the words "Fun in the sun"
Make sure it only goes the length of the sides...otherwise it may
look funky.  Duplicate that little phrase 2 times, giving you 3 copies.
Place one on the top of the tag - and place the other two at each
side, using Free Rotate 90 degrees either to the right or left.

Merge those three layers together.  Select all - Float - Defloat
Selections - Modify by 2 - Add a layer and color in that selection
with white.  Move layer just below the words we just typed out.
Merge down.  Apply drop shadow.

Resize again to your liking.
Then add your name and all copyright info.
Save as .png for a transparent background or .jpg
for a white background.

I hope you enjoyed this tut and it wasn't too confusing to you!

Thanks :o)